Short answer: setting up a UniFi Protect recorder takes well under an hour, and most of it is waiting. Rack it, connect it to the network, adopt it in the UniFi app, choose a storage protection level and let it prepare the drives — a few minutes — then install the applications and adopt your cameras. The part that deserves planning is migration: a camera can only belong to one console at a time, so moving cameras to a new recorder means releasing them from the old one first, and existing footage stays on the old recorder's drives. Plan for an overlap period rather than a hard cutover.
Before you start: what you need
Recorders arrive with less in the box than people expect, and the missing pieces are the ones that stop a Saturday install:
| Item | Included? | Notes |
|---|---|---|
| Hard drives | No | Every UniFi recorder ships empty. Buy surveillance-rated drives. |
| Rack rails and mounting hardware | Yes, on rack models such as the ENVR | Use them — a 16-bay chassis full of drives is heavy |
| PoE switch for the cameras | No | Only the UNVR Instant powers cameras itself. See the switch guide |
| Network connection | — | Recorder and cameras should be on the same network for discovery |
| Front bezel / touchscreen | No — optional | The ENVR bezel is a separate purchase |
| A UniFi account | — | Needed for remote access and Site Manager |
Choosing drives — the decision people get wrong
Three rules, in order of how often they are broken:
- Use surveillance-rated drives. Desktop drives are designed for intermittent use and fail early under continuous writing. Surveillance drives are built for 24/7 write loads and for many drives sharing one chassis.
- Check the compatibility list first. Ubiquiti publishes storage compatibility information, and it matters physically as well as electronically — some drives lack the mounting screw positions the caddies expect and simply will not fit.
- Buy bigger drives than you think. Bay count is fixed; drive size is the only thing you can change later without downtime. Sixteen bays of 18 TB disks is 288 TB raw, which is why an ENVR filled with large drives is rarely retention-limited.
Size capacity with Ubiquiti's own calculator at calculator.ui.com — enter camera counts by resolution, drive size and target retention, and it tells you how many drives you need. Do this before ordering, not after.
Racking and connecting
- Fit the rails to a four-post rack. On larger recorders the chassis has handles with release triggers for sliding it in and out — use them, and get a second pair of hands for a fully populated unit.
- Check depth, not just height. A 3U enterprise recorder can be around 480 mm deep and will not fit a shallow wall cabinet.
- Connectivity is at the rear on rack models — RJ45 and SFP+ ports depending on model.
- Plan power. On a dual-supply recorder, feed the two inputs from separate circuits or separate UPS units so you survive a circuit failure, not just a component failure.
- Expect fan noise. A multi-bay recorder is audible — clearly so in a quiet room, though usually not the loudest thing in a populated rack. It belongs in a comms room, not an office or living space.
First power-on and adoption
Power it up with the network connected and it announces itself. In the UniFi mobile app the new console appears automatically for adoption — you name it, accept or decline analytics, and it moves on to storage. The process is deliberately short; the setup wizard does the work.
Storage setup: protection levels, parity and hot spares
This is the one screen worth slowing down for, because it is set at initialisation rather than changed casually later.
The wizard lists the drives it has found and reports their health, then offers storage protection levels: a basic pool that maximises usable capacity, or parity-protected configurations that reserve drives so the array survives failures. You can also nominate a hot spare — a drive that sits idle and takes over automatically when another fails.
| Choice | Trade-off | Suits |
|---|---|---|
| Basic pool | Maximum usable capacity, no drive redundancy | Non-critical footage, tight budgets |
| Single parity | Survives one drive failure | Most business installations |
| Two parity drives | Survives two simultaneous failures; costs about an eighth of a 16-bay array | Evidence-grade systems, compliance obligations |
| Plus a hot spare | One more drive held in reserve; rebuild starts without a site visit | Remote or unmanned sites |
Drive preparation then runs for a few minutes with an on-screen countdown. Once it completes, the console is ready.
Installing the applications
A UniFi console is not only a recorder. After setup you choose which applications to install — typically UniFi Protect for cameras, and on capable hardware UniFi Access for doors and UniFi InnerSpace as well. Apply any firmware update offered before going further.
If you already run one of those applications on another console — an Access install on a Cloud Key, for example — it can be migrated onto the new hardware during this stage. For sites consolidating onto a recorder with redundant power, that is worth doing deliberately rather than leaving Access stranded on a device with a single supply.
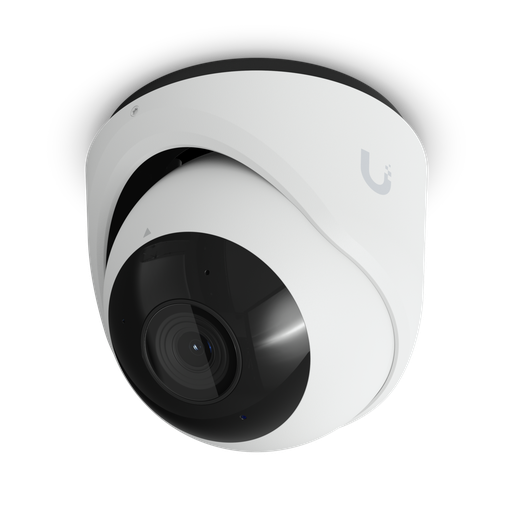
Shopping for UniFi Protect cameras?
Authorised Ubiquiti reseller: genuine Australian stock, full warranty, competitive prices and price match available.
Adding the console to Site Manager
To manage the recorder alongside your other UniFi consoles — and to reach it remotely — add it to your UniFi Site Manager workspace. The process is a token exchange: generate a token in your workspace, give it a description and expiry, verify it, then paste it into the console. The device then appears in the workspace with the rest of your estate, where you can add users and manage access centrally.
This is also the mechanism that lets multiple recorders across different locations be operated as one system, which is how large deployments scale past a single recorder's camera limit.
Adopting cameras
With Protect installed, cameras on the same network appear for adoption. Adopt them individually or in bulk, let any firmware updates run, and enable smart detections on the cameras where you want person, vehicle, animal or package events rather than plain motion.
Then do the part everyone skips: check the actual view of every camera and adjust aim before you leave. It is far cheaper than a second trip up a ladder. Our camera guide covers what each model can realistically see.
Migrating cameras from an existing recorder
This is the part that makes people hesitate, and it is worth being precise about.
A UniFi Protect camera belongs to one console at a time. It cannot be adopted by a new recorder while it is still managed by the old one. So migration is a two-step process per camera: remove it from the old console first, which releases it, then adopt it on the new one.
A sane migration order
- Build the new recorder completely first — drives, protection level, applications, firmware — while the old one keeps recording. No gap.
- Move a small batch of cameras — two or three, ideally low-priority ones. Release them on the old console, adopt them on the new one, confirm they record and that detections behave.
- Move the rest in batches, checking as you go, rather than releasing everything at once.
- Leave the old recorder running until its existing footage passes your retention window.
- Decommission it only once you no longer need what is on its drives — or repurpose it at another site.
What happens to your old footage
Plainly: footage recorded on the old recorder stays on the old recorder. Moving a camera to a new console does not move its history — the new recorder starts recording that camera from the moment it is adopted.
The practical consequences:
- Keep the old recorder powered and on the network until its footage ages past the period you are required to retain — 30, 60 or 90 days depending on your policy.
- Export anything specific before decommissioning — any clip tied to an incident, insurance claim or investigation should be exported and stored separately, not left on a device you are about to wipe.
- Do not wipe the old drives the same day you migrate, however tempting the reuse.
Both recorders can sit in Site Manager together during the overlap, so reviewing old footage while the new system runs is straightforward.
Archiving and backups
Two things worth configuring once the system is live:
- Console backups — schedule automatic configuration backups so a hardware failure does not also cost you the configuration.
- Footage archiving — footage can be archived off the recorder, including to network storage such as a UniFi NAS. This is the usual answer where retention requirements exceed what the bays can hold, or where an off-box copy is required for compliance.
Post-setup checklist
- Storage protection level set, and usable capacity checked against your retention target
- Firmware current on the console and every camera
- Smart detections enabled where you want them
- Every camera's view checked and aimed
- Console added to Site Manager, with the right people given access
- Automatic backups scheduled
- Recording verified — actually scrub back through footage from each camera
- Old recorder still running, with its retention window diarised
- Both power supplies fed from separate circuits where the hardware supports it
Ready to buy?
Shop genuine Ubiquiti at ARC IP Networks
Authorised Ubiquiti reseller
Ubiquiti at ARC IP Networks
UniFi gateways, switches, Wi-Fi, Protect cameras and Access. Genuine Australian stock with the full manufacturer's warranty, competitive prices and price match available.
Frequently asked questions
Well under an hour for most installations, and much of that is waiting. Racking and cabling is the physical work; adoption through the UniFi app takes a couple of minutes; drive preparation runs for a few minutes with an on-screen countdown; then application installation and camera adoption. Firmware updates on cameras can add time.
No. Every UniFi recorder ships with empty bays. Buy surveillance-rated drives designed for continuous write cycles rather than desktop drives, and check Ubiquiti's storage compatibility list first - some drives are physically incompatible because they lack the mounting screw positions the caddies expect.
Yes. A UniFi Protect camera belongs to one console at a time, so migration is two steps per camera: remove it from the old console to release it, then adopt it on the new one. Move cameras in small batches rather than releasing them all at once, because between release and adoption a camera is recording nowhere.
Existing footage stays on the old recorder's drives - moving a camera to a new console does not move its history, and the new recorder starts recording that camera from the moment it is adopted. So keep the old recorder powered and on the network until its footage ages past your retention period, and export anything tied to an incident or claim before decommissioning it.
Set at initialisation, so decide before you start. A basic pool maximises usable capacity with no drive redundancy. Single parity survives one drive failure and suits most business installations. Two parity drives survive two simultaneous failures and cost about an eighth of a 16-bay array - sensible where footage is evidence. A hot spare adds a reserve drive that takes over automatically, which is valuable at remote or unmanned sites.
Storage protection is configured when the array is initialised, so treat it as a decision to make properly at setup rather than something to revisit casually. Plan your capacity and protection level together, using Ubiquiti's calculator at calculator.ui.com to confirm the usable capacity meets your retention target.
The usual cause is that the recorder and your phone are on different VLANs or subnets, because discovery relies on local network broadcast. Put both on the same network for setup and segment afterwards. Also confirm the recorder has a network link and has finished booting.
On capable hardware, yes - a UniFi console can run Protect, Access and InnerSpace together, and existing installs can be migrated onto it from another console such as a Cloud Key during setup. Consolidating onto hardware with redundant power is worth doing deliberately rather than leaving Access on a device with a single supply.
Add each console to your UniFi Site Manager workspace using a generated token, and they appear together with the rest of your estate for central user and access management. This is also how large deployments scale past a single recorder's camera limit - multiple NVRs operated as one system regardless of where each is installed.
No. Keep it running until its recorded footage passes your retention window - 30, 60 or 90 days depending on policy - and export any clip tied to an incident, insurance claim or investigation before wiping the drives. Both recorders can sit in Site Manager during the overlap, so reviewing old footage while the new system runs is straightforward.
For every recorder except the UNVR Instant, yes - cameras are powered by a separate PoE switch. The UNVR Instant is the exception, with built-in PoE ports and an HDMI output, making it a complete small system in one box.
ARC IP Networks stocks the UniFi Protect recorder range in Australia as an authorised Ubiquiti reseller, with genuine Australian stock, manufacturer warranty, GST tax invoices and fast Australia-wide shipping. Browse recorders and cameras or call 1300 100 440.

Related reading
- Best UniFi cameras in Australia (2026), compared and ranked
- What else you need to buy with a UniFi NVR
- Outgrowing a UniFi Cloud Key: when to move to a rack console
- How much storage do you need for security cameras?
- UniFi Protect NVR comparison: which recorder do you need?
- Ubiquiti ENVR: the complete Australian guide
- Best UniFi Protect cameras in Australia
- UniFi switch comparison — PoE switching for cameras
- Buying Ubiquiti in Australia: authorised reseller guide
Who we are
About ARC IP Networks
ARC IP Networks is an Australian supplier of networking, Wi-Fi and gateway equipment, based in Blackburn, Melbourne, Victoria. We work with homeowners, installers, integrators and businesses across Australia, supplying Ubiquiti UniFi, MikroTik, TP-Link, Ruijie, Teltonika and D-Link.
We are an authorised Ubiquiti, MikroTik, TP-Link, Ruijie, Teltonika and D-Link reseller, so you get genuine Australian stock with the full manufacturer's warranty, never grey imports, at competitive prices. Our team can help you choose the right equipment, and trade customers get trade accounts and project pricing on larger jobs.
- Genuine Australian stock with the full manufacturer's warranty
- Competitive prices, price match available
- Trade accounts for installers, integrators and MSPs
- Australia-wide delivery; showroom in Blackburn, Mon–Fri 9–5 (demos by appointment)
Need help choosing?
Tell the ARC IP Networks team what you are trying to achieve and we will recommend the right equipment and quote it as one order.